CheckBox HTML Helper in ASP.NET MVC
What is CheckBox Helper?
CheckBox Helper is used to create a checkbox in Razor View.
Checkbox allows user to select Yes / No or True / False.
1️⃣ Basic Example
@Html.CheckBox("IsActive")
👉 Simple checkbox created.
2️⃣ Real Life Example
Registration Form – Accept Terms & Conditions
@Html.CheckBox("AcceptTerms") I Agree
bool accept = Convert.ToBoolean(Request["AcceptTerms"]);✔ If checked → true ✔ If not checked → false
3️⃣ Set Default Checked
@Html.CheckBox("IsActive", true)
4️⃣ Strongly Typed (Best Practice)
@Html.CheckBoxFor(m => m.IsActive)
Simple Summary
✔ Used for Yes / No selection ✔ Returns true or false ✔ Sends value to controller ✔ CheckBoxFor is better for real appsCheckbox Helper Example (Using Database – ADO.NET)
In this example, we are using Checkbox Helper with Database.
Before starting the MVC part, first we need to create the Database and Table in SQL Server.
Step 1: Create Database and Table
Below, I am providing the SQL script.
Follow these steps carefully:
- Open SQL Server Management Studio (SSMS)
- Click on New Query
- Copy the SQL code given below
- Paste it into the query window
- Click Execute (or press F5)
After running the script, the Database and Table will be created successfully.
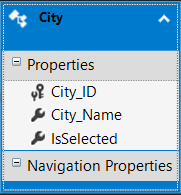
-- Step 1: Create Database
CREATE DATABASE MVC_CheckboxDB
GO

-- Step 2: Use Database
USE MVC_CheckboxDB
GO

-- Step 3: Create City Table
CREATE TABLE City
(
    City_ID INT IDENTITY(1,1) PRIMARY KEY,
    City_Name NVARCHAR(100) NOT NULL,
    IsSelected BIT NOT NULL
)
GO

-- Step 4: Insert Data
INSERT INTO City (City_Name, IsSelected) VALUES ('London', 0)
INSERT INTO City (City_Name, IsSelected) VALUES ('New York', 0)
INSERT INTO City (City_Name, IsSelected) VALUES ('Sydney', 1)
INSERT INTO City (City_Name, IsSelected) VALUES ('Mumbai', 0)
INSERT INTO City (City_Name, IsSelected) VALUES ('Cambridge', 0)
INSERT INTO City (City_Name, IsSelected) VALUES ('Delhi', 0)
INSERT INTO City (City_Name, IsSelected) VALUES ('Hyderabad', 1)

GO

-- Step 5: Check Data
SELECT * FROM City
Steps After Creating a New ASP.NET MVC Project
After opening Visual Studio 2022, click Create a new project.
- Choose ASP.NET Web App (Model-View-Controller) and language C#.
- Click Next, Visual Studio will configure the project.
- Enter the Project Name and Project Location.
- Select the .NET Framework Version you need.
- Click Create to create the project.
Select Empty Template
- Tick the MVC option to add Model, View, and Controller folders along with core references.
- Click Create again to finalize the project.
Project Created Successfully:
Now, to add the database model: Right-click on your Project Name → Add → New Item → Select Data → ADO.NET Entity Data Model → Click Add.
Create Home Controller
Go to the Controllers folder 📁, right-click on it, and select Add → Controller.
Choose MVC 5 Controller – Empty and click Add.
Name the controller HomeController and click Add.
After creating the controller, open HomeController.cs .
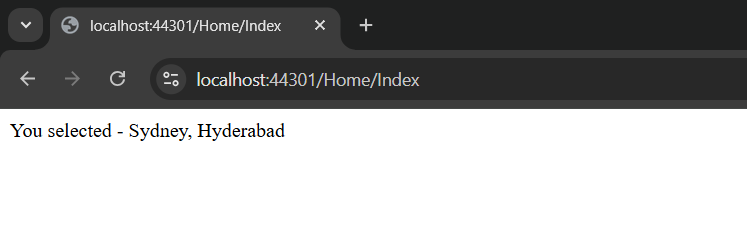
using System;
using System.Collections.Generic;
using System.Linq;
using System.Text;
using System.Web;
using System.Web.Mvc;

namespace Your_Project_Name.Controllers
{
    public class HomeController : Controller
    {
        [HttpGet]
        public ActionResult Index()
        {
            MVC_CheckboxDBEntities dbContext = new MVC_CheckboxDBEntities();

            return View(dbContext.Cities.ToList());
        }

        [HttpPost]
        public string Index(IEnumerable<City> cities)
        {
            if (cities.Count(x => x.IsSelected) == 0)
            {
                return "You have not selected any City";
            }
            else
            {
                StringBuilder sb = new StringBuilder();

                sb.Append("You selected - ");

                foreach (City city in cities)
                {
                    if (city.IsSelected)
                    {
                        sb.Append(city.City_Name + ", ");
                    }
                }
                sb.Remove(sb.ToString().LastIndexOf(","), 1);
                return sb.ToString();
            }
        }
    }
}
Create Index View
Now open HomeController.
Right-click on the Index action method → Select Add View.
Choose MVC 5 View.
Configure the Add View options:
- View Name: Index
- Template: Empty (without model)
- Model Class:
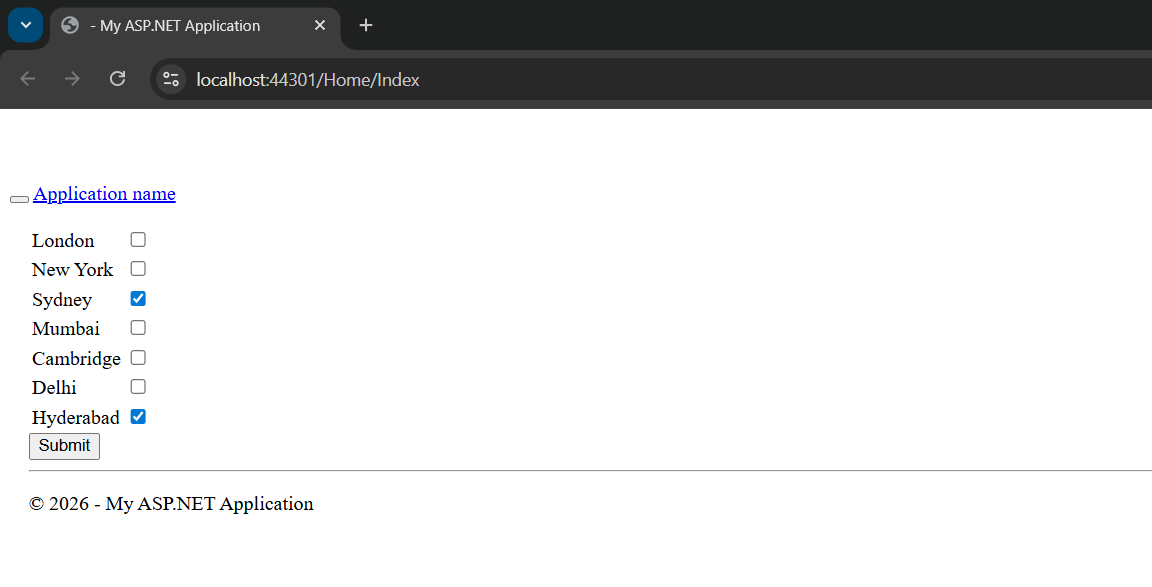
@model List<Your_Project_Name.City>

@using (Html.BeginForm())
{
    <table>
        @for (int i = 0; i < Model.Count; i++)
        {
            <tr>
                <td>

                    @Html.HiddenFor(m => m[i].City_ID)
                    @Html.HiddenFor(m => m[i].City_Name)
                    @Html.DisplayFor(m => m[i].City_Name)

                </td>

                <td>

                    @Html.CheckBoxFor(m => m[i].IsSelected)

                </td>
            </tr>
        }
    </table>

    <input type="submit" value="Submit" />
}
Output
Application URL
https://localhost:44301/Home/Index