Strongly Typed Views
What is Strongly Typed View?
A Strongly Typed View is a view that is directly connected to a Model class in an ASP.NET MVC application.
It allows us to access model properties using @Model.PropertyName.
It provides compile-time checking.
It supports IntelliSense.
Why Do We Use Strongly Typed Views?
- To send structured data
- Safer than ViewBag
- Avoid runtime errors
- Best for real-world applications
Real-Life Example:
Imagine a teacher gives a complete student record file instead of verbally telling the student name.
- Teacher → Controller
- Student File → Model
- Class Board → View
Everything is structured and safe.
Step 1: Create Model
public class Student
{
    public string Name { get; set; }

    public int Marks { get; set; }
}
Step 2: Controller Code
public ActionResult Index()
{
    Student student = new Student()
    {
        Name = "Ali",
        Marks = 90
    };
    return View(student);
}
Step 3: Make View Strongly Typed
Add this line at the top of your View (.cshtml file):
@model Your_Web_Application_Name.Models.StudentStep 4: Access Model Data in View
<h2>
    Student Name: @Model.Name
</h2>

<h3>
    Marks: @Model.Marks
</h3>
Strongly Typed View vs ViewBag
| Strongly Typed View | ViewBag |
|---|---|
| Type-safe | Dynamic |
| Compile-time checking | Runtime checking |
| Supports IntelliSense | No IntelliSense |
| Best for large & structured data | Best for small data |
Important:
If you write wrong property name:
@Model.Namess // ❌ Compile-time Error
You will get error immediately. That is why Strongly Typed Views are more professional.
Summary
- ViewBag → Dynamic & temporary
- Strongly Typed View → Safe & structured
- Used in real-world MVC applications
Passing Data from Controller to View Using Strongly Typed View
Inside the Models folder, right-click and select Add → Class. Create a new class file named Student.cs .
This class defines the properties of a student, such as Name, Address, and City. It represents the structure of student data used in the application.
Simple:
In a Strongly Typed View, the Controller sends the model object directly to the View instead of using ViewBag.
using System;
using System.Collections.Generic;
using System.Linq;
using System.Web;

namespace Your_Web_Application_Name.Models
{
    public class Student
    {
        public int StudentId { get; set; }

        public string Name { get; set; }

        public string Address { get; set; }

        public string Course { get; set; }

        public int Fees { get; set; }
    }
}
Inside the Models folder, right-click and select Add → Class. Create a new class file named StudentBusinessLayer.cs .
The StudentBusinessLayer class is responsible for handling the business logic related to students. It retrieves student details and prepares the data to be used by the Controller.
In this class, the GetEmployeeDetails() method accepts a Student ID as a parameter, creates a Student object, assigns values (like Name, Address, Course, and Fees), and returns the student data.
Currently, the data is hardcoded for learning purposes. Later, this can be connected to a database to fetch real student records.
using System;
using System.Collections.Generic;
using System.Linq;
using System.Web;

namespace Your_Web_Application__Name.Models
{
    public class StudentBusinessLayer
    {
        public Student GetEmployeeDetails(int StudentId)
        {
            Student stu = new Student()
            {
                StudentId = StudentId,
                Name = "AIT",
                Address = "Aurangabad",
                Course = "DFD",
                Fees = 45000
            };
            return stu;
        }
    }
}
First, go to the Controllers folder, right-click on it, and select Add → Controller. Create a controller named HomeController .
Now open HomeController.cs.
Inside the Index method, create an object of StudentBusinessLayer and get the student details.
Instead of using ViewBag, pass the Student model directly to the View using: return View(student);
Then open Index.cshtml and define the model at the top of the file using: @model Your_Project_Name.Models.Student
Simple:
In a Strongly Typed View, the controller sends the model directly to the View instead of using ViewBag.
using System;
using System.Collections.Generic;
using System.Linq;
using System.Web;
using System.Web.Mvc;
using Your_Web_Application__Name.Models;

namespace Your_Web_Application_Name.Controllers
{
    public class HomeController : Controller
    {
        public ActionResult Index()
        {
            StudentBusinessLayer studentBL = new StudentBusinessLayer();

            Student stu = studentBL.GetEmployeeDetails(102);

            ViewBag.Header = "Student Details";

            return View(stu);
        }
    }
}
Go to the HomeController, right-click on the Index action method, and select Add View.
This will create the Index.cshtml file inside the Views → Home folder.
This View receives the student data from ViewBag sent by the HomeController .
We access the student object using ViewBag.Students and display the heading using ViewBag.Header.
Then, we show the student details in a table format.
Simple: Right-click on HomeController → Add View → It shows the student data sent from the Controller using ViewBag.
@model Your_Web_Application__Name.Models.Student

@{
    ViewBag.Title = "Index";
}

<h2>Index</h2>

<div>

    <h4>Student</h4>
    <hr />

    <dl class="dl-horizontal">

        <dt>
            @Html.DisplayNameFor(model => model.Name)
        </dt>

        <dd>
            @Html.DisplayFor(model => model.Name)
        </dd>

        <dt>
            @Html.DisplayNameFor(model => model.Address)
        </dt>

        <dd>
            @Html.DisplayFor(model => model.Address)
        </dd>

        <dt>
            @Html.DisplayNameFor(model => model.Course)
        </dt>

        <dd>
            @Html.DisplayFor(model => model.Course)
        </dd>

        <dt>
            @Html.DisplayNameFor(model => model.Fees)
        </dt>

        <dd>
            @Html.DisplayFor(model => model.Fees)
        </dd>

    </dl>

</div>
Output
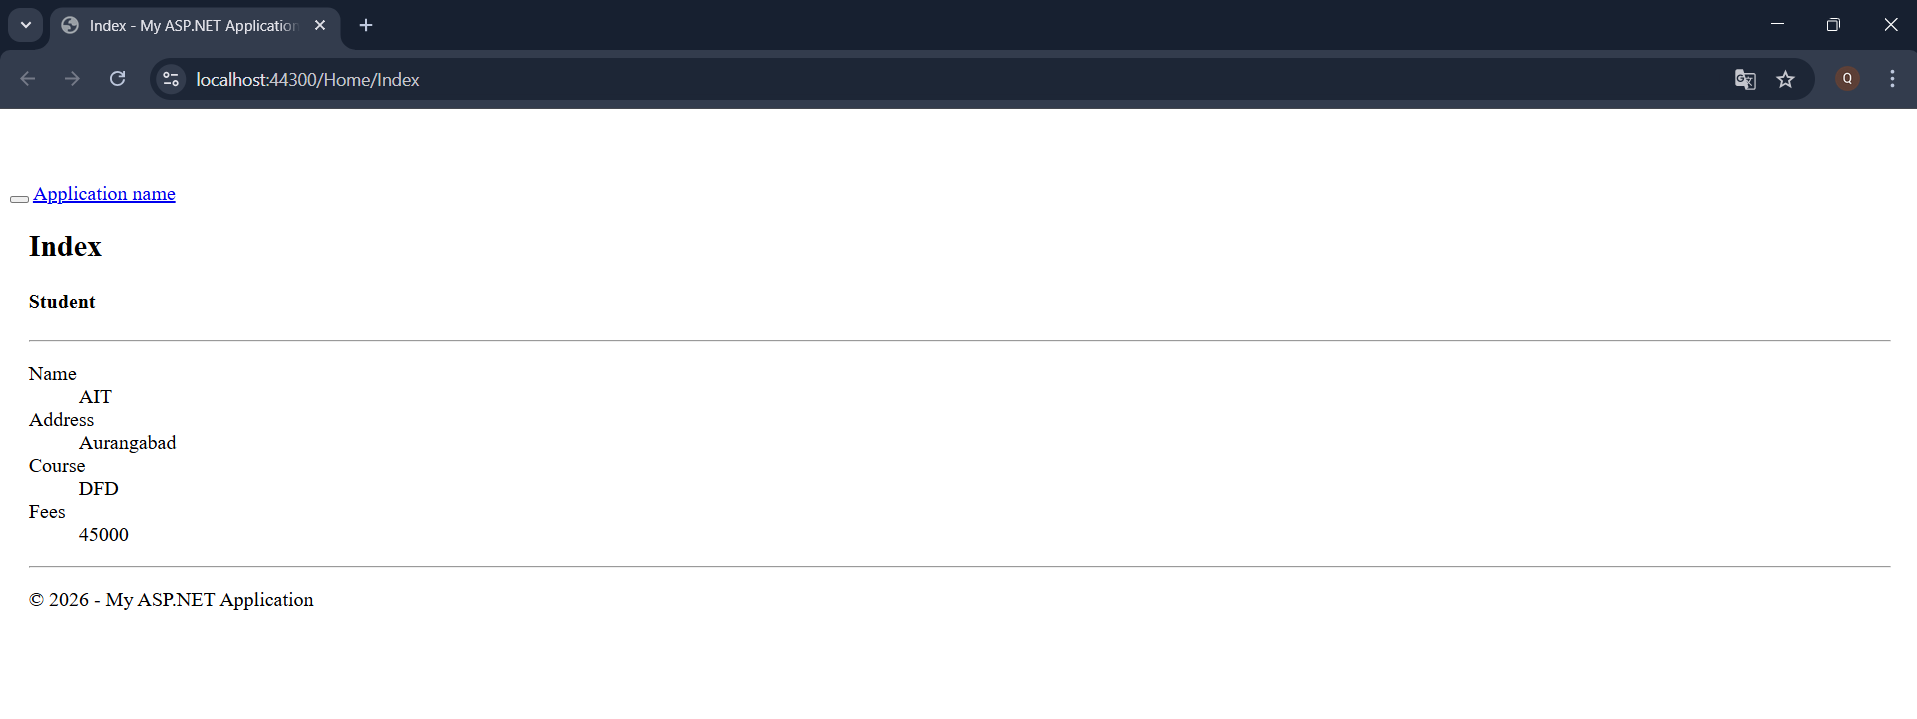
Application URL
https://localhost:44300/Home/Index