ViewModel
What is ViewModel?
A ViewModel is a class specially created to pass multiple or combined data from Controller to View.
It is not a database model.
It is made only for the View.
It helps when one View needs data from multiple models.
Why Do We Use ViewModel?
- To combine multiple models
- To send complex data to a View
- To keep code clean and organized
- Best practice in real-world projects
Real-Life Example:
Imagine a teacher gives:
- Student details
- Subject details
- Marks
All combined in one file for display. That combined file is called ViewModel.
Example Scenario:
We want to show:
- Student Name
- Marks
- Subject Name
Step 1: Create Models
public class Student
{
    public string Name { get; set; }

    public int Marks { get; set; }
}

public class Subject
{
    public string  SubjectName { get; set; }
}
Step 2: Create ViewModel
public class StudentViewModel
{
    public string Name { get; set; }

    public int Marks  { get; set; }

    public string SubjectName { get; set; }
}
Step 3: Controller Code
public ActionResult Index()
{
    StudentViewModel vm = new StudentViewModel()
    {
        Name = "Ali",

        Marks =  88,

        SubjectName = "Mathematics"
    };
    return View(vm);
}
Step 4: Make View Strongly Typed
@model YourProjectName.Models.StudentViewModel
Step 5: Display Data in View
<h2>
    Student Name: @Model.Name
</h2>

<h3>
    Marks: @Model.Marks
</h3>

<h4>
    Subject: @Model.SubjectName
</h4>
ViewModel vs Model
| Model | ViewModel |
|---|---|
| Represents Database Table | Represents View Data |
| Used for CRUD operations | Used for displaying combined data |
| Directly connected to DB | Not directly connected to DB |
Passing Multiple Models to View Using ViewModel
Inside the Models folder, right-click and select Add → Class. Create a new class file named Employee.cs .
This class defines the properties of an employee, such as EmployeeId, Name, Department, and Salary. It represents the structure of employee data used in the application.
using System;
using System.Collections.Generic;
using System.Linq;
using System.Web;

namespace Your_Project_Name.Models
{
    public class Employee
    {
        public int EmployeeId { get; set; }
        public string Name { get; set; }
        public string Gender { get; set; }
        public string Department { get; set; }
        public decimal Salary { get; set; }
        public int AddressId { get; set; }
    }
}
Again, go to the Models folder, right-click on it, and select Add → Class. Create another class file named Address.cs .
This class defines the address details such as AddressId, Country, State, City, and Pin.
It represents the structure of address data used in the application.
using System;
using System.Collections.Generic;
using System.Linq;
using System.Web;

namespace Your_Project_Name.Models
{
    public class Address
    {
        public int AddressId { get; set; }
        public string Country { get; set; }
        public string State { get; set; }
        public string City { get; set; }
        public string Pin { get; set; }
    }
}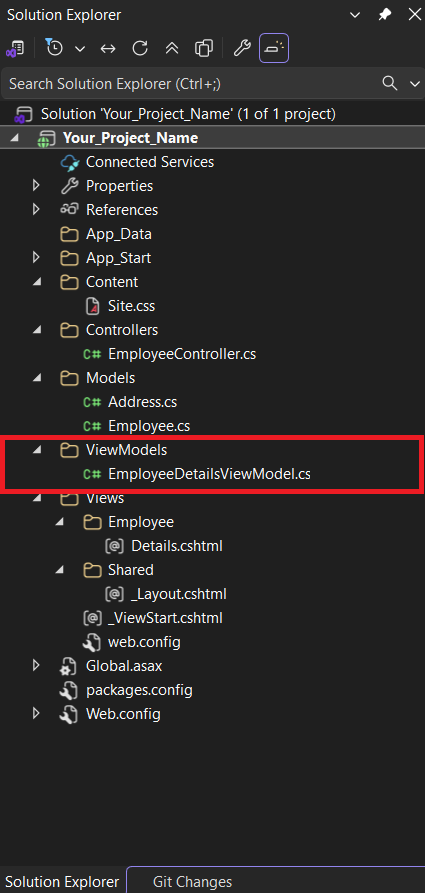
Now, create a new folder for the ViewModel.
In Solution Explorer, right-click on your Project Name 📁 Select Add → New Folder.
Rename the folder as 📁 ViewModels .
After creating the folder, right-click on the 📁 ViewModels folder and select Add → Class. Name the class EmployeeDetailsViewModel.cs .
Simple:
Project Name 📁 → Add Folder → 📁 ViewModels →
Right Click 📁 ViewModels → Add Class →
Name it EmployeeDetailsViewModel.
using System;
using System.Collections.Generic;
using System.Linq;
using System.Web;
using Your_Project_Name.Models;   // Using Models Classes

namespace Your_Project_Name.ViewModels
{
    public class EmployeeDetailsViewModel
    {
        public Employee Employee { get; set; }
        public Address Address { get; set; }
        public string PageTitle { get; set; }
        public string PageHeader { get; set; }
    }
}
Now, go to the Controllers folder 📁, right-click on it, and select Add → Controller.
Choose MVC 5 Controller – Empty and click Add.
Name the controller EmployeeController and click Add.
After clicking Add, the file EmployeeController.cs will be created inside the Controllers folder.
Simple:
Controllers 📁 → Right Click → Add Controller →
Name it EmployeeController.
using System;
using System.Collections.Generic;
using System.Linq;
using System.Web;
using System.Web.Mvc;
using Your_Project_Name.Models;       // Using Models Classes
using Your_Project_Name.ViewModels;   // Using ViewModels Classes

namespace Your_Project_Name.Controllers
{
    public class EmployeeController : Controller
    {
        // GET: Employee
        public ViewResult Details()
        {
            // Employee Basic Details
            Employee employee = new Employee()
            {
                EmployeeId = 101,
                Name = "AIT",
                Gender = "Male",
                Department = "IT",
                Salary = 10000,
                AddressId = 1001
            };

            // Employee Address
            Address address = new Address()
            {
                AddressId = 1001,
                City = "Aurangabad",
                State = "Maharashtra",
                Country = "India",
                Pin = "431001"
            };

            // Creating the ViewModel
            EmployeeDetailsViewModel employeeDetailsViewModel = new EmployeeDetailsViewModel()
            {
                Employee = employee,
                Address = address,
                PageTitle = "Employee Details Page",
                PageHeader = "Employee Details"
            };

            // Pass ViewModel to View
            return View(employeeDetailsViewModel);
        }
    }
}
Adding Details View and Updating Code
Go to the EmployeeController. Right-click on the Details() action method and select Add View.
In the Add View window:
- View Name: Details
- Select MVC 5 View
- Choose template: Empty (without model)
- Click Add
After the View is created, open Details.cshtml.
Now remove the default content inside the file.
Then copy the code that I have provided below and paste it into the Details.cshtml file.
Simple:
Right-click on Details → Add View → Select Empty → Click Add →
Copy the given code and paste it into the View file.
@model Your_Project_Name.ViewModels.EmployeeDetailsViewModel    // Using ViewModels Class

@{
    Layout = null;
}

<html xmlns="http://www.w3.org/1999/xhtml">
<head>
    <title>@Model.PageTitle</title>
</head>

<body>

    <h1>@Model.PageHeader</h1>

    <div>
        EmployeeID : @Model.Employee.EmployeeId
    </div>

    <div>
        Name : @Model.Employee.Name
    </div>

    <div>
        Gender : @Model.Employee.Gender
    </div>

    <div>
        Department : @Model.Employee.Department
    </div>

    <div>
        Salary : @Model.Employee.Salary
    </div>

    <h1>Employee Address</h1>

    <div>
        City : @Model.Address.City
    </div>

    <div>
        State : @Model.Address.State
    </div>

    <div>
        Country : @Model.Address.Country
    </div>

    <div>
        Pin : @Model.Address.Pin
    </div>

</body>
</html>
Output
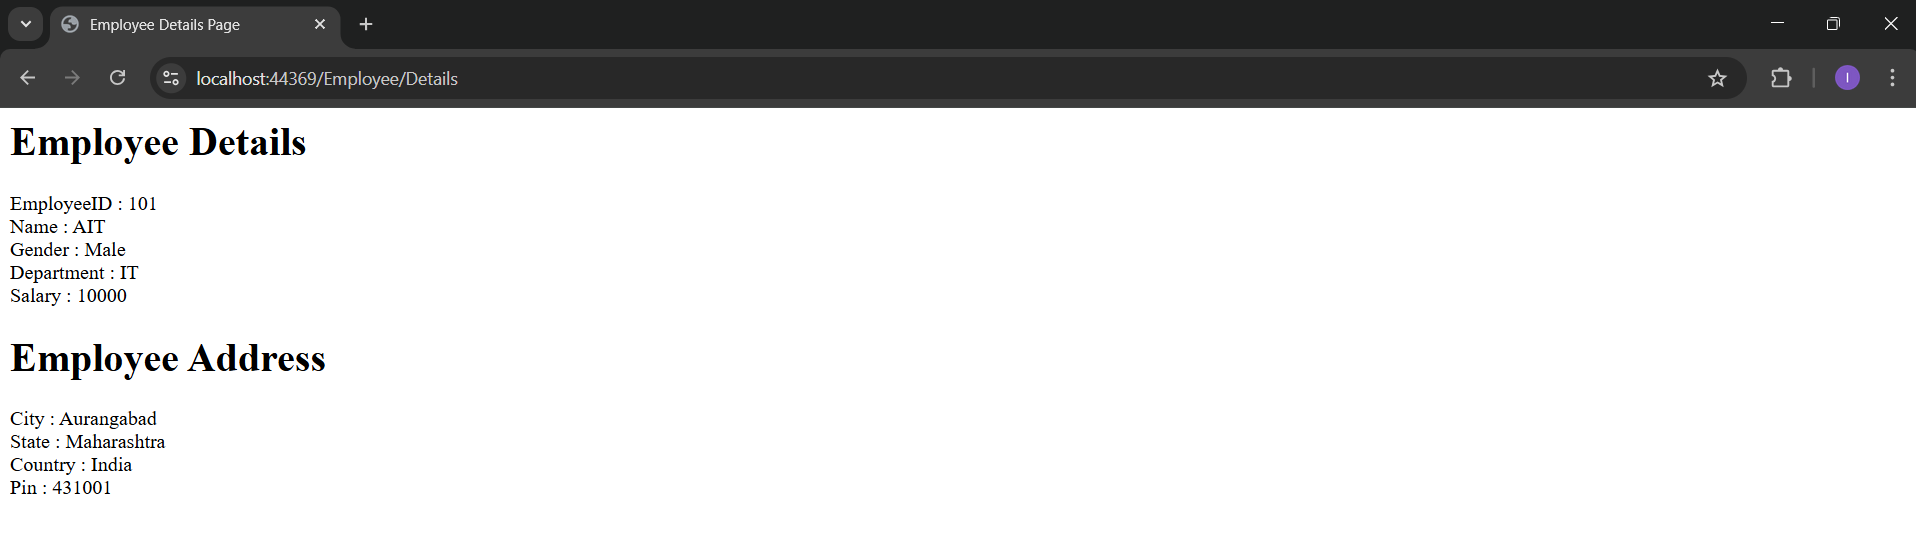
Application URL
https://localhost:44369/Employee/Details