CheckBox HTML Helper
what is CheckBox HTML Helper in ASP.NET MVC?
In ASP.NET MVC, the Html.CheckBox HTML Helper is used to generate an HTML checkbox input element (<input type="checkbox">) in a strongly typed manner. It helps bind model properties to form elements in Razor Views.
CheckBox HTML Helper in MVC Application:
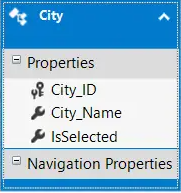
To understand the CheckBox HTML Helper in MVC, we are going to use the following “City” table.
Please use the following SQL script to create the city table and fill it with the necessary test data.
CREATE TABLE City
(
  City_ID INT IDENTITY PRIMARY KEY,
  City_Name NVARCHAR(100) NOT NULL,
  IsSelected BIT NOT NULL
)
Insert into City values ('London', 0)
Insert into City values ('New York', 0)
Insert into City values ('Sydney', 1)
Insert into City values ('Mumbai', 0)
Insert into City values ('Cambridge', 0)
Insert into City values ('Delhi', 0)
Insert into City values ('Hyderabad', 1)
Let’s add the ADO.NET data model to retrieve data from the database
Creating Controller:
Right-click on the "Controllers" folder and add a new controller named "HomeController". After creating the controller, copy and paste the following code into it.
namespace HTML_HELPER.Controllers
{
    public class HomeController : Controller
    {
        [HttpGet]
        public ActionResult Index()
        {
            CityDBContext dbContext = new CityDBContext();
            return View(dbContext.Cities.ToList());
        }
        [HttpPost]
        public string Index(IEnumerable<city> cities)
        {
            if (cities.Count(x => x.IsSelected) == 0)
            {
                return "You have not selected any City";
            }
            else
            {
                StringBuilder sb = new StringBuilder();
                sb.Append("You selected - ");
                foreach (City city in cities)
                {
                    if (city.IsSelected)
                    {
                        sb.Append(city.City_Name + ", ");
                    }
                }
                sb.Remove(sb.ToString().LastIndexOf(","), 1);
                return sb.ToString();
            }
        }
    }
}
Create the Index view and then insert the following code into it.
@model List<html_helper.models.city>
@{
    ViewBag.Title = "Index";
}
@using (Html.BeginForm())
{
    for (var i = 0; i < Model.Count(); i++)
    {
        <table>
            <tr>
                <td>
                    @Html.HiddenFor(it => it[i].City_ID)
                    @Html.HiddenFor(it => it[i].City_Name)
                    @Html.DisplayFor(it => it[i].City_Name)
                </td>
                <td>
                    @Html.CheckBoxFor(it => it[i].IsSelected, new { Style = "vertical-align:3px}" })
                </td>
             </tr>
        </table>
    }
    <input id="Submit1" type="submit" value="submit" />
}
That's it! Our implementation is complete. Now, run the application and verify the requirement; you will see it functions as expected.