Controllers in ASP.NET MVC
Controllers in ASP.NET MVC Application
In this article, I will discuss Controllers in an ASP.NET MVC application. Before proceeding, I recommend reading our previous article, where we explored the purpose and usage of ASP.NET MVC folders and files that are automatically generated when creating a new ASP.NET MVC 5 application. As part of this article, we will cover the following key points related to MVC Controllers:
What is a Controller in an ASP.NET MVC application?
In an ASP.NET MVC application, a controller is a class that consists of a set of public methods. These public methods are known as action methods or simply actions. These action methods are responsible for handling incoming HTTP requests in an ASP.NET MVC application.
In an ASP.NET MVC application, controllers logically group similar types of actions together. This organization enables the application of shared rules, such as routing, caching, and authorization, to all grouped actions collectively. Please refer to the following diagram for a clearer visualization of the controller.
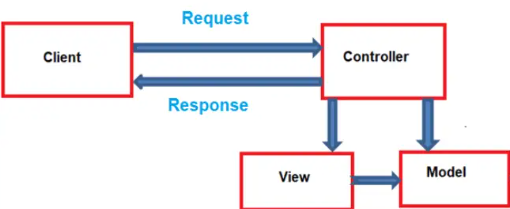
As illustrated in the diagram, the Controller is responsible for handling incoming HTTP requests and processing them. During this process, the controller performs several key tasks:
- It interacts with the model to retrieve or modify data.
- It selects the appropriate view to display the response.
- If needed, it passes the model object to the view for rendering.
The view then generates the required HTML, and the controller sends this HTML response back to the client who made the initial request.
Thus, the Controller serves as the core of the MVC application, managing the interaction between the model, view, and user requests.
In ASP.NET MVC, controller classes are typically stored in the root Controllers directory of the project. These classes inherit from the System.Web.Mvc.Controller base class, following the framework’s conventions.
To better understand how Controllers function in an ASP.NET MVC application, let's go through an example.
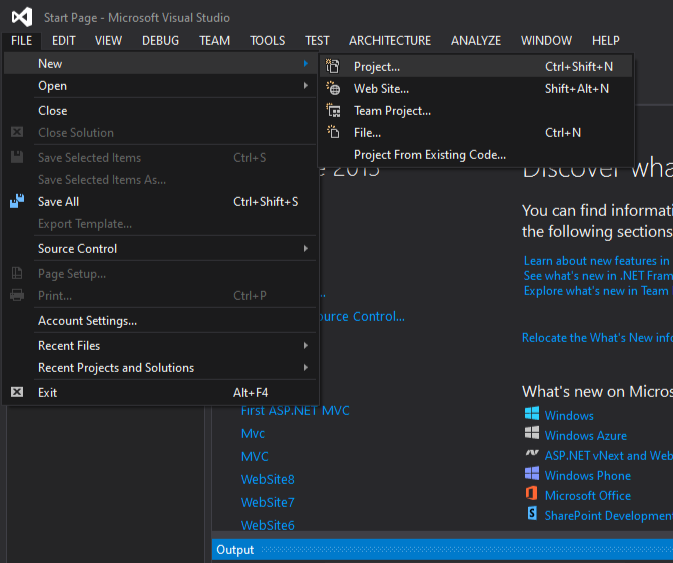
Creating an Empty ASP.NET MVC application:Open Visual Studio and go to File > New > Project.
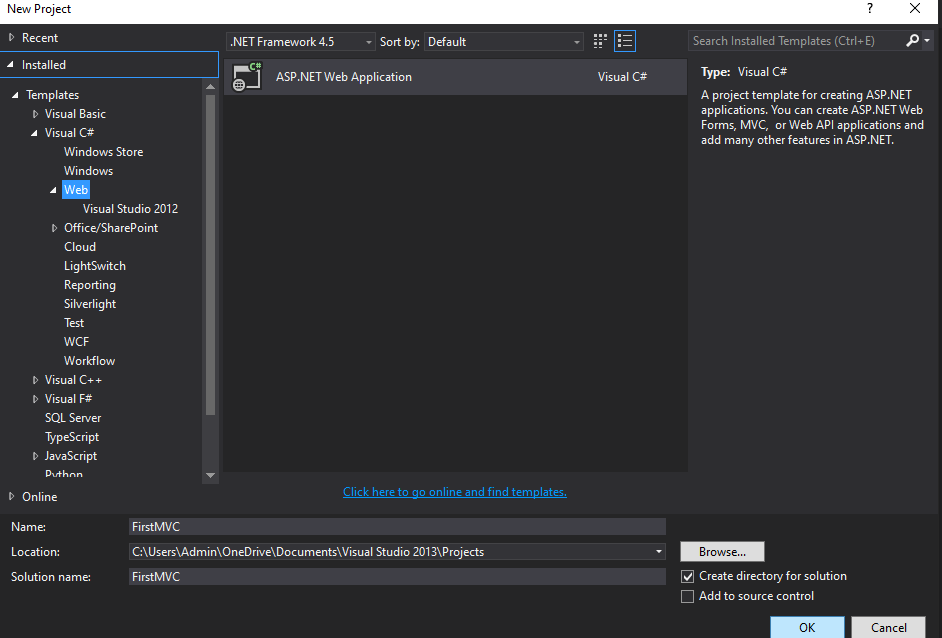
After clicking on the “Project” link, a new dialog box will appear. In the New Project window, navigate to the left pane and select the Web template under Visual C#, which is found within the “Installed – Templates” section.
Next, from the middle pane, choose ASP.NET Web Application and enter FirstMVC as the project name. Finally, click on the OK button, as shown in the image below.
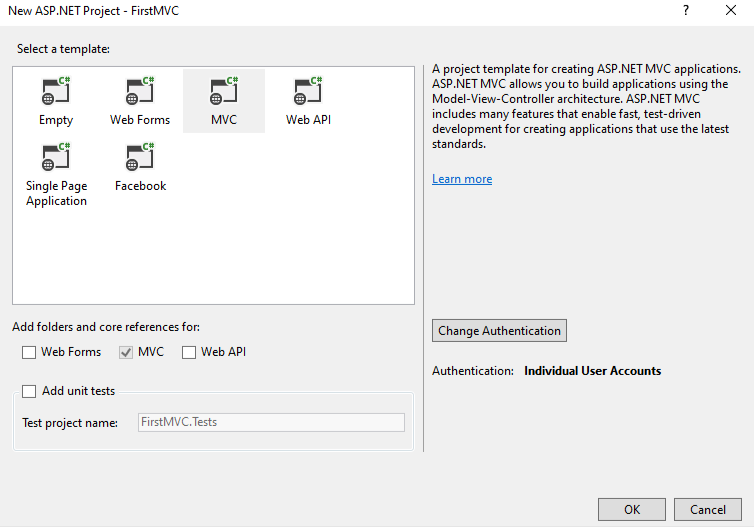
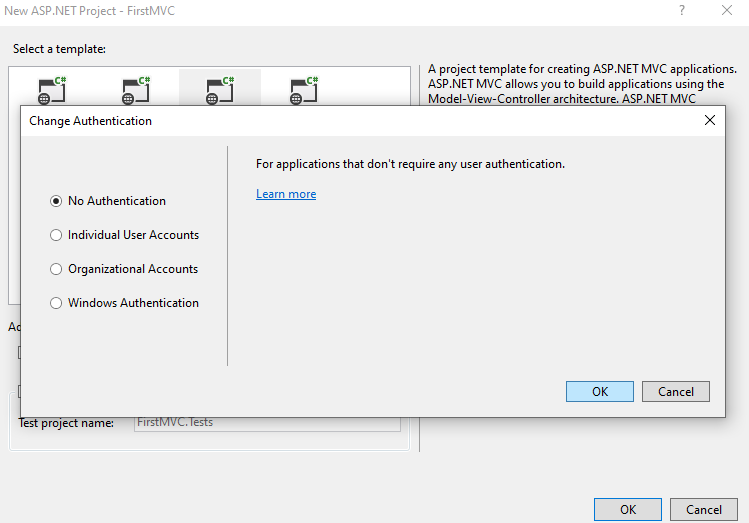
After clicking the OK button, a new dialog window titled New ASP.NET Web Application will appear, allowing you to choose the project template. From this window, select the Empty project template, as we will be creating everything from scratch. Finally, click on the OK button, as shown in the image below.
After clicking the OK button, it will take a few moments to generate the project using the empty template, and the following default folder structure will be created.
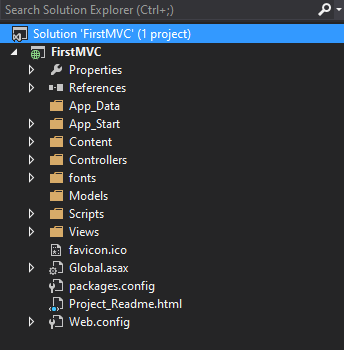
As shown in the image above, the project is generated with various folders like Models, Views, and Controllers, each designated to hold their respective components. We will explore Models and Views in a future article, while this article will focus on the Controllers.
Adding Controller to the Project:
To add a controller to your project, follow the steps below:
1. Right-click on the “Controllers” folder.
2. Select Add > Controller.
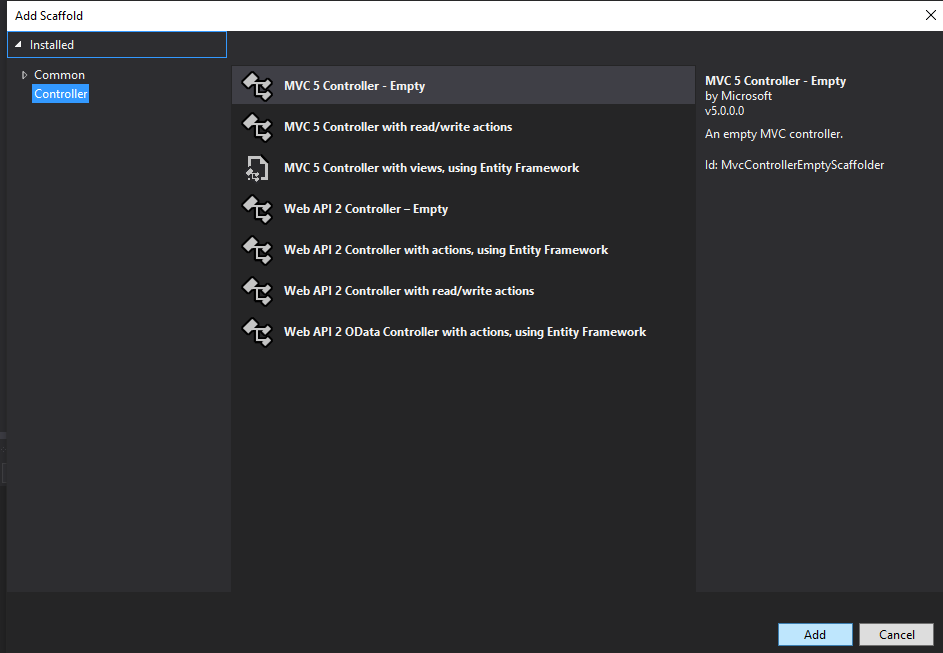
3. Choose MVC 5 Controller – Empty.
4. Click the ADD button as shown in the image below.
After clicking the Add button, a new pop-up window will appear where you need to enter a name for your controller. Set the controller name as HomeController and click the Add button as shown in the image below.

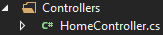
After clicking the Add button, you should see HomeController.cs within the “Controllers” folder, as shown in the image below.
At this point, if you run your application, you will encounter the following error.
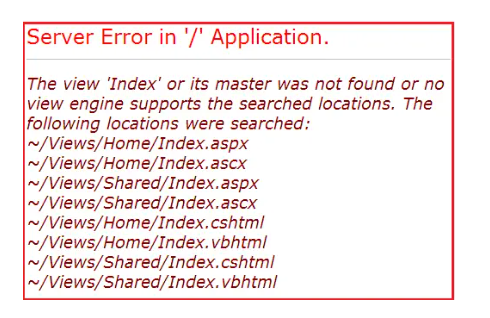
Fixing the Error:
To resolve the above error, we need to add a view named “Index”. We will go over views in detail in our next article. For now, we will address the issue in an alternate way. Below is the function that is auto-generated by the HomeController class.
            namespace FirstMVC.Controllers
            {
                    public class HomeController : Controller
                {
                    public ActionResult Index()
                    {
                    return View();
                    }
                }
            }
To resolve the issue, change the return type of the Index() action method from "ActionResult" to "string". Then, return a string like "Hello MVC 5 Application" as demonstrated below.
            namespace FirstMVC.Controllers
            {
                public class HomeController : Controller
                {
                    public string Index()
                    {
                        return "Hello MVC 5 Application";
                    }
                }
            }
With the above changes, run the application and you will see the string as expected in the browser window.
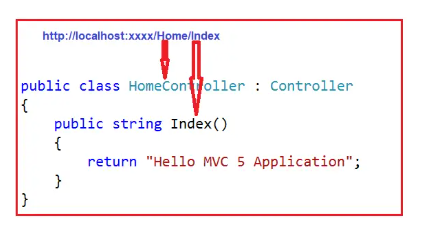
Now change the URL to http://localhost:xxxx/Home/Index
In the URL “Home” is the name of the controller and “Index” is the name of the action method within the HomeController class. So the important point that you need to keep in mind is the incoming URL in an ASP.NET MVC application is mapped to a controller action method as shown in the below image.
A common question that may arise is where this mapping is actually defined.
This mapping is handled inside the RegisterRoutes() method of the RouteConfig class. As mentioned earlier in our discussion on the ASP.NET MVC Folder and File Structure, all configuration-related files are located in the App_Start folder. Therefore, you can find the RouteConfig class within the App_Start directory.
Next, open the RouteConfig.cs file, and you will notice that the RegisterRoutes() method inside the RouteConfig class defines a default route, as illustrated in the image below.

In the URL, we did not provide a value for the id parameter, yet the application still functions as expected. This is because, as shown in the default route configuration, the id parameter is marked as optional. Now, let’s pass an id value in the URL and observe the outcome.
http://localhost:xxxx/Home/Index/10
After navigating to the above URL, no changes were observed. Now, modify the implementation of the Index() action method within the HomeController class as shown below.
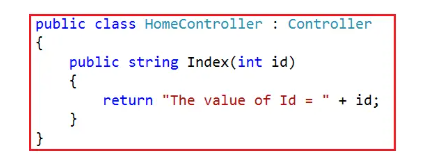
Now, when you navigate to “/Home/Index/10”, the number 10 is assigned to the id parameter of the Index action method, resulting in the following message being displayed in the browser.
The value of Id = 10Next, let's modify the implementation of the Index action method to accept a query string parameter, as shown below.
            using System.Web.Mvc;
            namespace FirstMVC.Controllers
            {
                public class HomeController : Controller
                {
                    public string Index(string id, string name)
                    {
                        return "The value of  Id = " + id + " and Name = " + name;
                    }
                }
            }
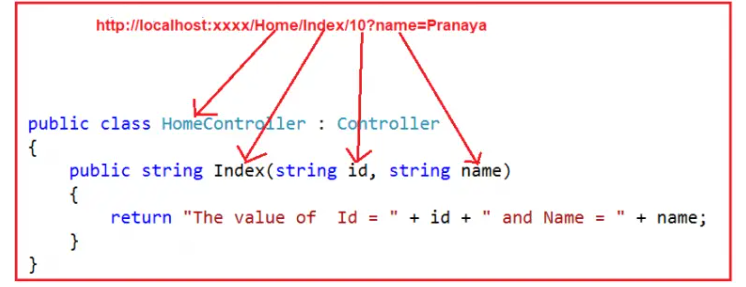
Now, let's make a request using a query string, as demonstrated below.
http://localhost:xxxx/Home/Index/10?name=James
In the specified URL, the id parameter is assigned the value 10, while the name parameter receives its value from the query string. Consequently, the parameters are mapped as shown in the accompanying image.
In MVC, you can also utilize the Request.QueryString to fetch the query string parameter, as demonstrated below.
            using System.Web.Mvc;
            namespace FirstMVC.Controllers
            {
                public class HomeController : Controller
                {
                    public string Index(string id, string name)
                    {
                        return "Id = " + id + " ,Name = " + Request.QueryString["name"];
                    }
                }
            }
1. A controller in an ASP.NET MVC application is a class that inherits from System.Web.Mvc.Controller.
2. The MVC controller serves as the intermediary between the Models and Views.
3. The controller class consists of public methods known as action methods, which handle incoming HTTP requests.
4. In ASP.NET MVC, every controller class name must end with “Controller.” For instance, the controller for the home page should be named HomeController, while the controller for student-related actions should be named StudentController.
5. Every controller class must be placed within the Controllers folder.
In the next article, I will discuss ASP.NET MVC Views with Examples. In this article, I have explained the concept of Controllers in an ASP.NET MVC application with examples. I hope this article on Controllers in ASP.NET MVC will be helpful to you.