Entity Framework in ASP.NET MVC
Entity Framework in ASP.NET MVC
This article explores how to integrate Entity Framework into an ASP.NET MVC application to interact with a SQL Server database for performing CRUD operations. In an ASP.NET MVC application, the controller processes incoming HTTP requests, retrieves data from the model, and passes it to the view. The view then displays the data accordingly. The model can consist of entities or business objects. In this discussion, we will focus on retrieving data from a SQL Server database using the Entity Framework Database First approach in an ASP.NET MVC application. In a future article, we will cover how to use business objects as the model.
Creating the Database with Required Table and Data:Kindly use the following SQL script to create the MVC_DB database, set up the Employee table, and insert test data into it.
--Create a database called MVC_DB
CREATE DATABASE MVC_DB
GO
--Use MVC_DB
USE MVC_DB
GO
--Create a Table called Employee
CREATE TABLE Employee
(
  EmployeeId int Primary Key Identity(1,1),
  Name nvarchar(50),
  Gender nvarchar(10),
  City nvarchar(50),
  Salary decimal(18,2)
)
GO
--Insert some values into Employee Table
INSERT INTO Employee values('Shaista','Female','Aurangabad', 3000)
INSERT INTO Employee values('Noorain','Female','Mumbai', 4000)
INSERT INTO Employee values('Anam','Female','Hydrabad', 2000)
INSERT INTO Employee values('Arshiya','Female','Cheenai', 3000)
INSERT INTO Employee values('Subrat','Male','Aurangabad', 3000)
INSERT INTO Employee values('Preety','Female','Mumbai', 2000)
INSERT INTO Employee values('Trupti','Female','Aurangabad', 5000)
GO
Let's go through the step-by-step process of using Entity Framework in an ASP.NET MVC application.
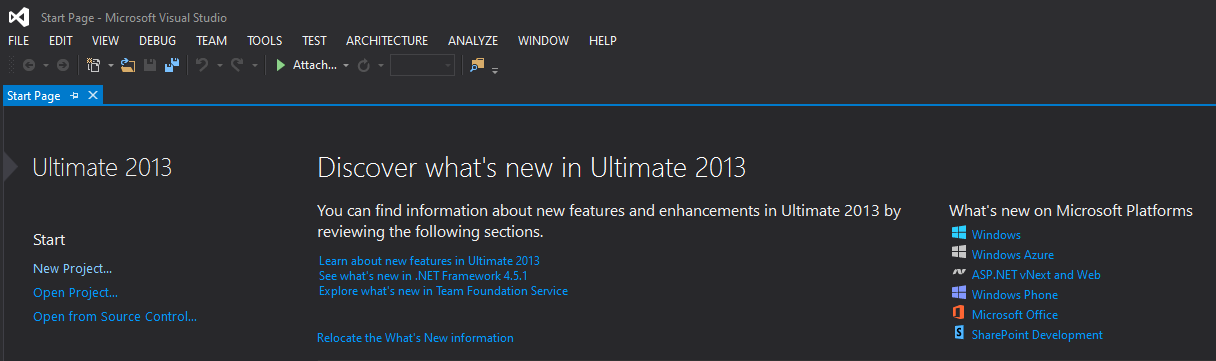
Step1: Create a new Empty ASP.NET MVC ApplicationOpen Visual Studio and click on the New Project link on the Startup page as shown below. Alternatively, you can also select the File menu -> New Project option from the Context menu.
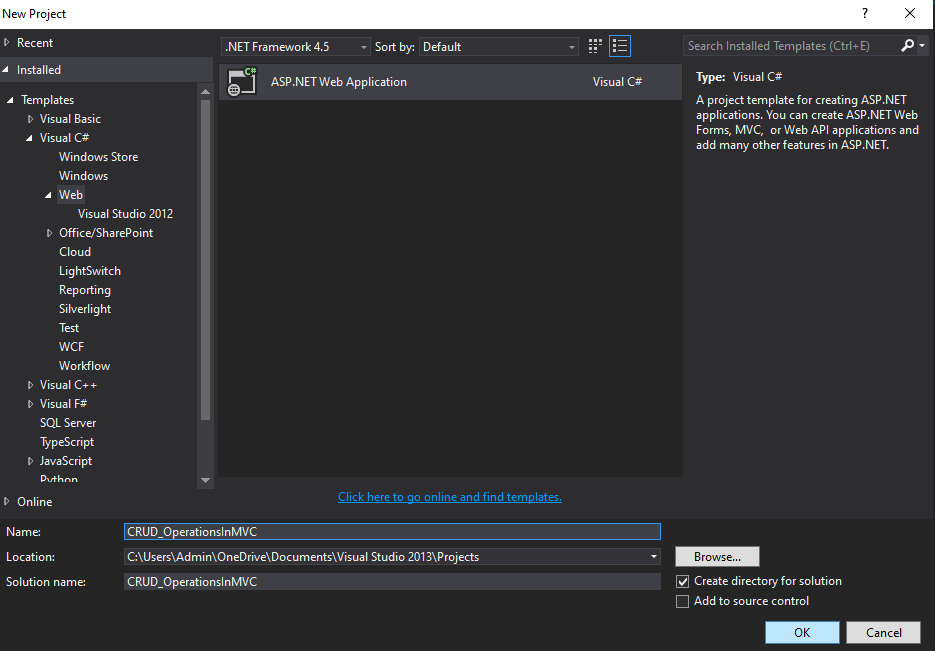
In the New Project window, expand the Visual C# node and select Web from the left pane. Then, from the middle pane, choose ASP.NET Web Application. Assign a meaningful name to your project, such as CRUD_OperationsInMVC. Click the Browse button to select the desired location for your project. Finally, click OK to proceed, as shown in the image below.
After clicking the OK button, a new dialog box will appear for selecting project templates, as shown in the image below. From this window, choose the Empty project template and check the MVC option under the "Add Folders and Core References" section.
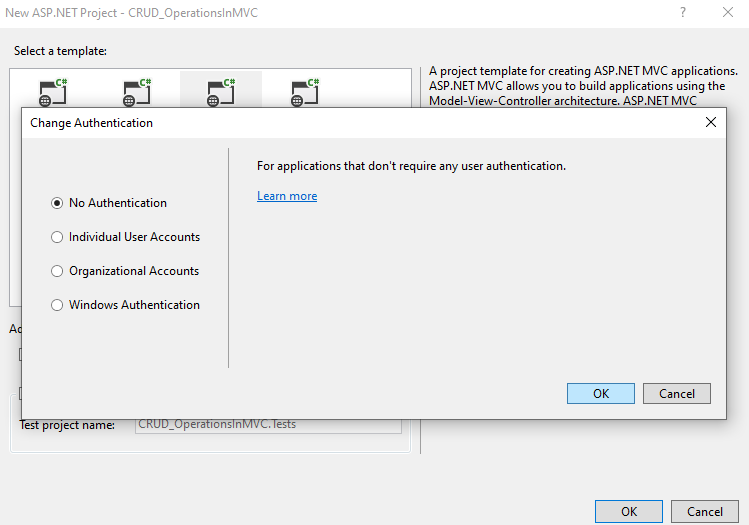
You can modify the authentication settings by clicking the Change Authentication button and selecting the appropriate authentication mode for your application. In this case, we are not implementing authentication, so choose the No Authentication option and click OK. (By default, Individual User Accounts is selected, which enables authentication using users stored in the SQL Server database.)
Wait for a moment while Visual Studio generates a basic MVC project using the default template.
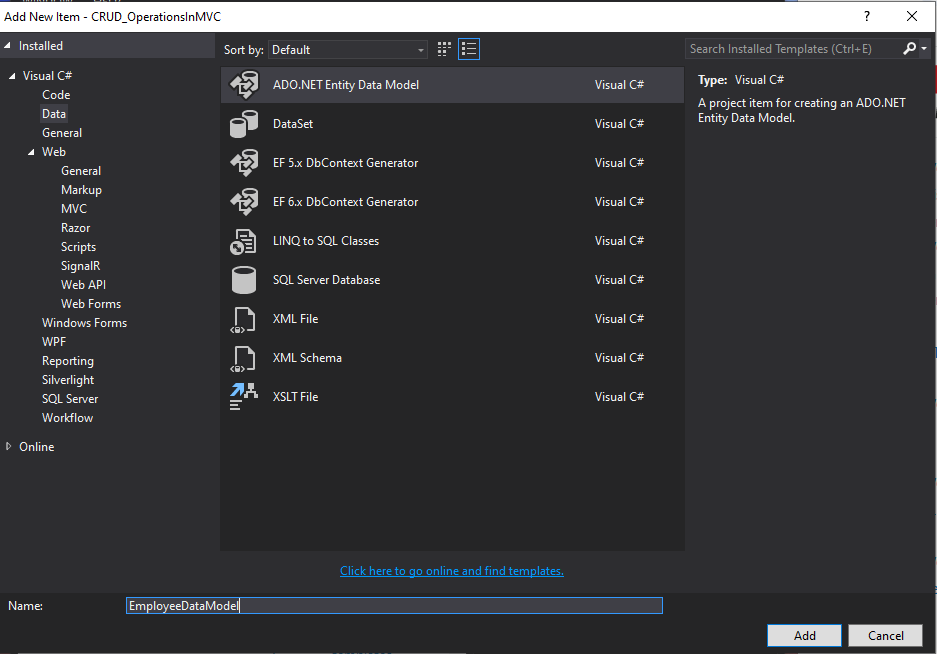
Step2: Adding ADO.NET Entity Data Model in ASP.NET MVC ApplicationRight-Click on Models Folder, and then select Add => New Item from the context menu which will open the Add New Item window. From the “Add New Item” window, from the left pane expand Installed => Visual C# => Data option. From the middle pane select the ADO.NET Entity Data Model template. Provide a meaningful name to your data model such as EmployeeDataModel and finally click on the Add button as shown in the below image.
On the next screen of the Entity Data Model Wizard, select the EF Designer from Database option, as we are using the Entity Framework Database First approach. Then, click the Next button, as shown in the image below.

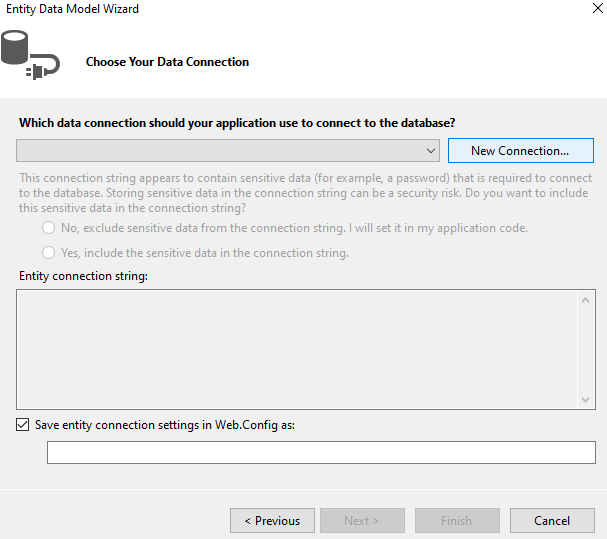
In the next step, click on New Connection in the Choose Your Data Connection wizard, as shown below.
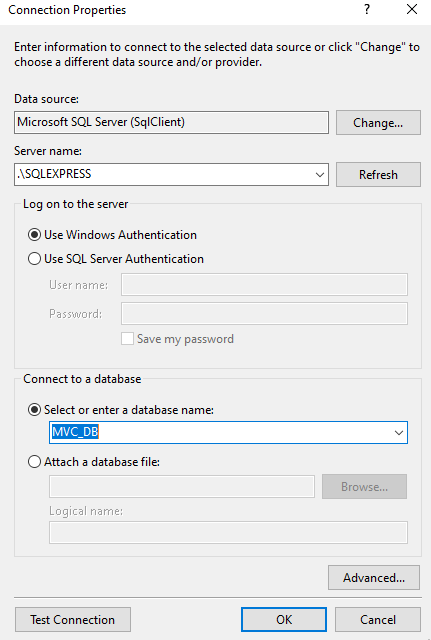
Provide the required details to establish a database connection, including the Server Name, choose the Authentication Type, select the Database, and then click the OK button to proceed, as shown below.
Next, assign a meaningful name to the connection string that will be saved in the web.config file. In this case, the connection string is named EmployeeDBContext. After entering the name, click the Next button, as shown in the image below.

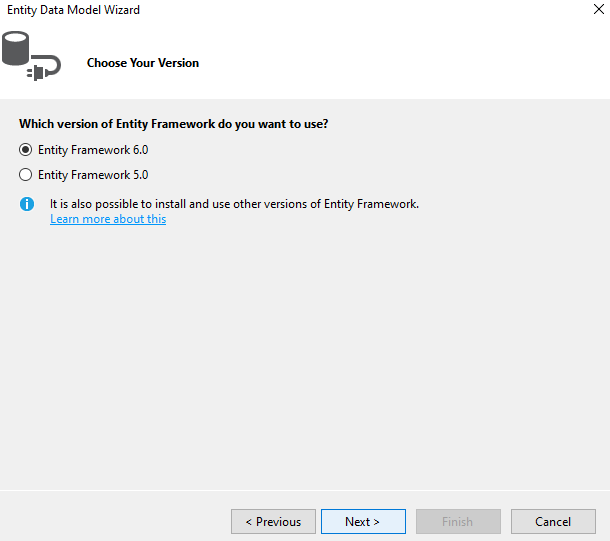
Select the version of Entity Framework
Since I am using Entity Framework 6.x, I will select the Entity Framework 6.x radio button and then click the Next button, as shown in the image below.
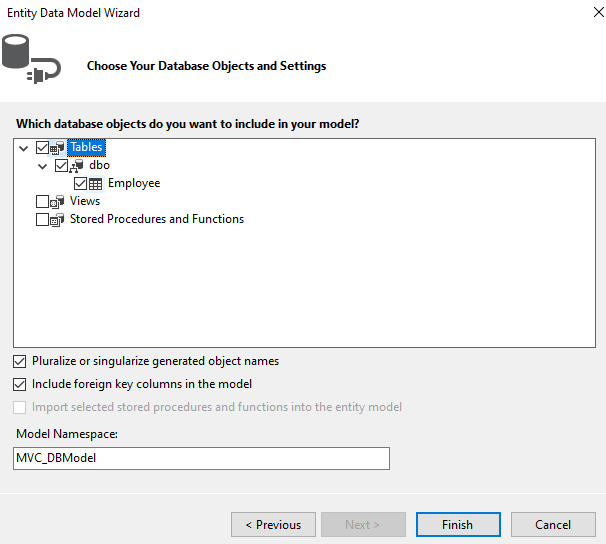
Selecting the Database Objects
Next, we need to select the database objects for our application. Since our database contains a single table, we will select the Employee table. Additionally, provide a meaningful namespace for the EDMX file. Finally, click the Finish button, as shown in the image below.
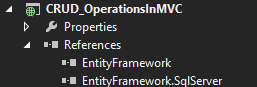
After clicking the Finish button, let's review what Entity Framework has generated. It will automatically add a reference to Entity Framework in the References folder of the project.
The framework will create the EDMX file within the Models folder.
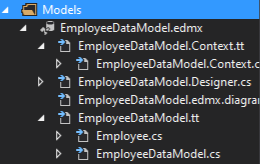
It will create the Employee Model.
To see the Employee Model click on Employee.cs file, this is inside the EmployeeDataModel.tt File
namespace CRUD_OperationsInMVC.Models
{
    using System;
    using System.Collections.Generic;

    public partial class Employee
    {
        public int EmployeeId { get; set; }
        public string Name { get; set; }
        public string Gender { get; set; }
        public string City { get; set; }
        public Nullable<decimal> Salary { get; set; }
    }
}
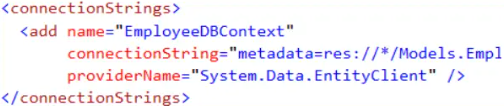
It will create the connection string in the web.config file as shown below.
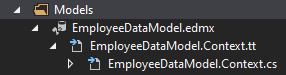
Entity Framework will generate a DbContext class named EmployeeDBContext, which matches the connection string name. This EmployeeDBContext class inherits from DbContext and manages the connection to the database. Additionally, it creates the EmployeeDataModel.Context.cs file, which is located inside EmployeeDataModel.Context.tt, as shown in the image below.
Below is the auto-generated code for the EmployeeDBContext class
namespace CRUD_OperationsInMVC.Models
{
    using System;
    using System.Data.Entity;
    using System.Data.Entity.Infrastructure;

    public partial class EmployeeDBContext : DbContext
    {
        public EmployeeDBContext()
            : base("name=EmployeeDBContext")
        {
        }

        protected override void OnModelCreating(DbModelBuilder modelBuilder)
        {
            throw new UnintentionalCodeFirstException();
        }

        public virtual DbSet<employee> Employees { get; set; }
    }
}
That's it! We have successfully created our Entity Data Model. Now, we can start using this model in our application to interact with the database.
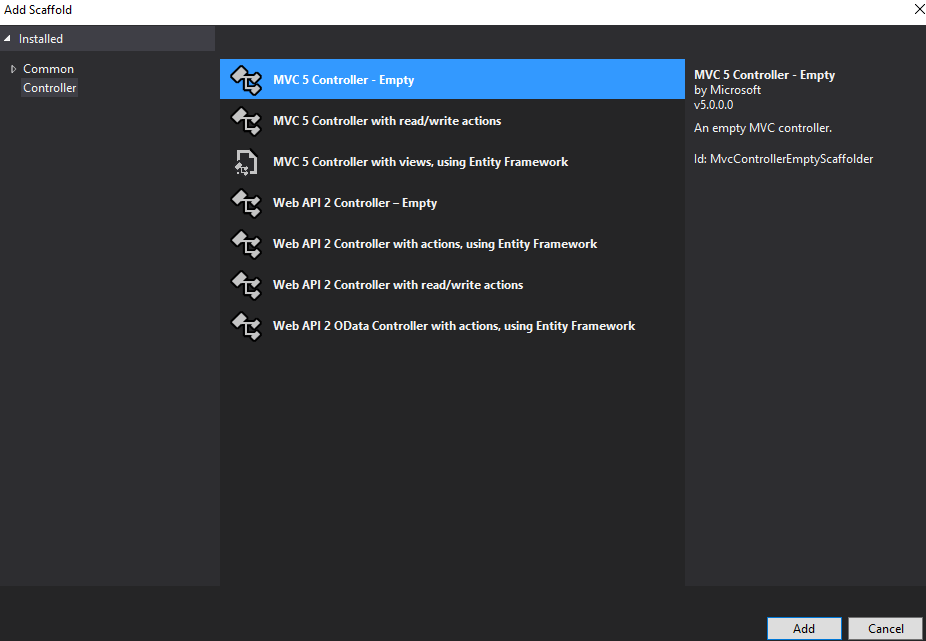
Creating Controller:Right-Click on Controllers Folder. Select Add => Controller => Select MVC5 Controller Empty and then click on add button as shown in the below image.
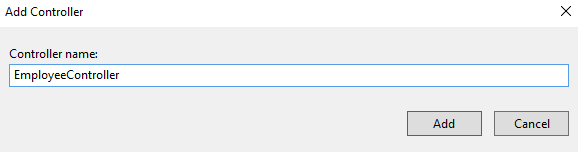
On the next screen, enter EmployeeController as the controller name and then click the Add button, as shown in the image below.
To ensure the application navigates to the Index action method of the EmployeeController when it starts, we need to update the default route in the RouteConfig class. This modification will automatically direct users to the EmployeeController's Index action upon launching the application.
After updating the RouteConfig class, the modified code appears as follows:
namespace CRUD_OperationsInMVC
{
    public class RouteConfig
    {
        public static void RegisterRoutes(RouteCollection routes)
        {
            routes.IgnoreRoute("{resource}.axd/{*pathInfo}");
            routes.MapRoute(
                name: "Default",
                url: "{controller}/{action}/{id}",
                defaults: new { controller = "Employee", action = "Index", id = UrlParameter.Optional }
            );
        }
    }
}
namespace CRUD_OperationsInMVC.Controllers
{
    public class EmployeeController : Controller
    {
        public ActionResult Index()
        {
            EmployeeDBContext dbContext = new EmployeeDBContext();
            List<Employee> empList = dbContext.Employees.ToList();
            return View(empList);
        }
    }
}
Right-click on the Index action method and select Add View. Then, open the Index.cshtml file and paste the following code inside it.
@model IEnumerable<CRUD_OperationsInMVC.Models.Employee>
<table class="table">
    <tr>
        <th>
            @Html.DisplayNameFor(model => model.Name)
        </th>
        <th>
            @Html.DisplayNameFor(model => model.Gender)
        </th>
        <th>
            @Html.DisplayNameFor(model => model.City)
        </th>
        <th>
            @Html.DisplayNameFor(model => model.Salary)
        </th>
    </tr>
    @foreach (var item in Model)
    {
        <tr>
            <td>
                @Html.DisplayFor(modelItem => item.Name)
            </td>
            <td>
                @Html.DisplayFor(modelItem => item.Gender)
            </td>
            <td>
                @Html.DisplayFor(modelItem => item.City)
            </td>
            <td>
                @Html.DisplayFor(modelItem => item.Salary)
            </td>
        </tr>
    }
</table>
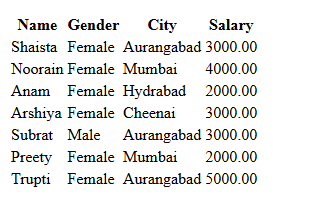
That's it! Now, run the application, and you should see the expected output, as shown in the image below.
In this article, we explored how to integrate Entity Framework into an ASP.NET MVC application. In the upcoming articles, we will delve into performing CRUD operations using Entity Framework with a real-time example. Additionally, in the next article, we will learn how to create Hyperlinks in an ASP.NET MVC application.