ActionLink HTML Helper in ASP.NET MVC
ActionLink HTML Helper in ASP.NET MVC to Generate Hyperlinks
In this article, I will explain how to create hyperlinks in an ASP.NET MVC application using the ActionLink HTML Helper. Before proceeding, I recommend reading our previous article, as we will continue working with the same example. Previously, we explored how to use the Entity Framework Database First Approach in an ASP.NET MVC application to interact with a SQL Server Database. Hyperlinks are commonly used for navigation between web pages. While we will cover HTML Helpers in detail in a later article, this article will focus specifically on generating hyperlinks using the ActionLink HTML Helper in ASP.NET MVC.
ActionLink HTML Helper in ASP.NET MVC:
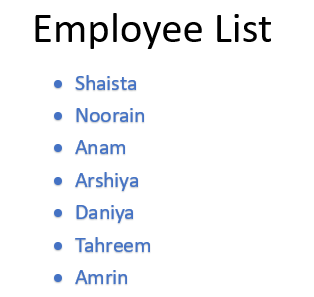
Let's explore the purpose and usage of the ActionLink HTML Helper in an ASP.NET MVC application with an example. Our goal is to display a list of employees in a bulleted format, as shown in the image below. Notice that each employee's name is displayed as a clickable hyperlink. This allows users to navigate to a detailed view or perform specific actions related to the selected employee.
When the hyperlink on the name is clicked, it should redirect to the employee details page, where the complete details of the employee will be displayed, as shown in the image below.
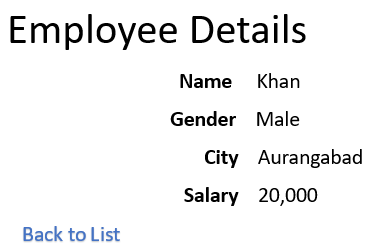
Again, when we click on the “Back to List” button, we will be redirected to the employee list page.
Let’s see how to achieve this.Please update the EmployeeController to include the Details action method. Now, the controller will have two action methods: Index and Details, as demonstrated below.
namespace CRUD_OperationsInMVC.Controllers
{
    public class EmployeeController : Controller
    {
        public ActionResult Index()
        {
            EmployeeDBContext dbContext = new EmployeeDBContext();
            List<employee> empList = dbContext.Employees.ToList();
            return View(empList);
        }
        public ActionResult Details(int id)
        {
            EmployeeDBContext dbContext = new EmployeeDBContext();
            Employee employee = dbContext.Employees.FirstOrDefault(x => x.EmployeeId == id);
            return View(employee);
        }
    }
}
The ActionLink HTML Helper method provides multiple overloaded versions. However, we will use the following version, which accepts the link text, action method name, and route values as parameters. The first parameter indicates that it is an extension method, allowing us to access it using the HtmlHelper object.
public static MvcHtmlString ActionLink(this HtmlHelper htmlHelper, string linkText, string actionName, object routeValues);
Modifying the Index View:In our example, the `Index` action method fetches the list of employees and passes it to the `Index` view for rendering. Now, let’s modify the `Index` view to display employee names as hyperlinks using the `ActionLink` HTML Helper method, as shown below.
@model IEnumerable<CRUD_OperationsInMVC.Models.Employee>
@using CRUD_OperationsInMVC.Models;
<div style="font-family:Arial">
    @{
        ViewBag.Title = "Employee List";
    }
    <h2>Employee List</h2>
    <ul>
        @foreach (Employee employee in @Model)
        {
            <li>@Html.ActionLink(employee.Name, "Details", new { id = employee.EmployeeId })</li>
        }
    </ul>
</div>
In the above code, we define `@model` as `IEnumerable <crud_operationsinmvc.models.employee>`. The hyperlinks are generated using the `Html.ActionLink` HTML helper method. This method accepts three parameters: the first parameter specifies the link text displayed in the browser, the second parameter represents the action method name, and the third parameter contains the route values, which are passed to the `Details` action method.
Adding Details view:
The Details action method takes a parameter as EmployeeId and then gets the employee details based on the Employee ID. Once it gets the employee details then it passes that employee object to the view and then the view displays the employee details. Let’s Add Details View and then copy and paste the following codes into it.
@model CRUD_OperationsInMVC.Models.Employee
<div>
    <h4>Employee Details</h4>
    <hr />
    <dl class="dl-horizontal">
        <dt>
            @Html.DisplayNameFor(model => model.Name)
        </dt>
        <dd>
            @Html.DisplayFor(model => model.Name)
        </dd>
        <dt>
            @Html.DisplayNameFor(model => model.Gender)
        </dt>
        <dd>
            @Html.DisplayFor(model => model.Gender)
        </dd>
        <dt>
            @Html.DisplayNameFor(model => model.City)
        </dt>
        <dd>
            @Html.DisplayFor(model => model.City)
        </dd>
        <dt>
            @Html.DisplayNameFor(model => model.Salary)
        </dt>
        <dd>
            @Html.DisplayFor(model => model.Salary)
        </dd>
    </dl>
</div>
<p>
    @Html.ActionLink("Back to List", "Index")
</p>
That's all! We've successfully completed the implementation. Now, it's time to run the application and verify that everything functions as expected. In this article, we explored how to use the ActionLink HTML Helper in an ASP.NET MVC application. In future articles, we will dive deeper into HTML Helpers and explore them with real-world examples.
In the next article, I will cover how to work with multiple database tables in an ASP.NET MVC application with a practical example. In this article, I have explained how to generate hyperlinks using the ActionLink HTML Helper in an ASP.NET MVC application with a simple example. I hope this guide on the ActionLink HTML Helper proves useful for your learning and implementation needs.